Step 1
Download the certificate file from this link
Download the key file from this link
Save these two files to your home directory, or another directory of your choice
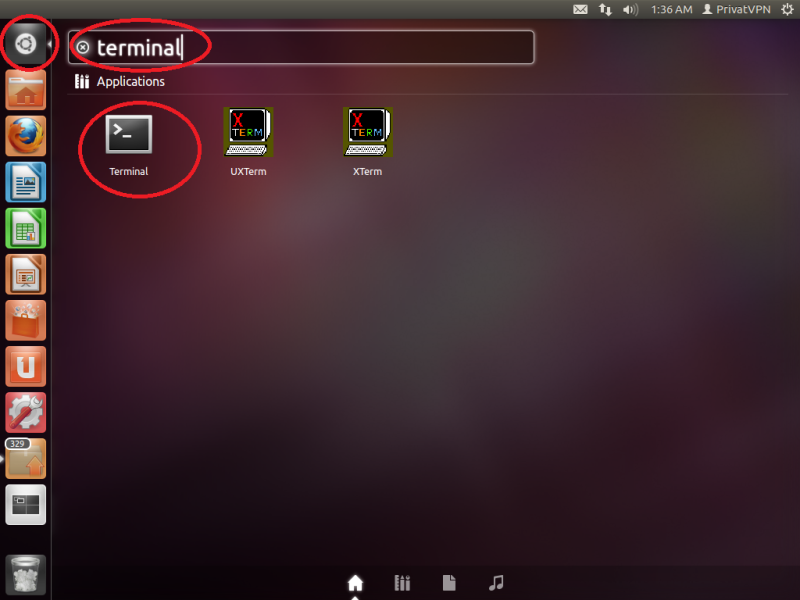
Step 2
Click on the Ubuntu button in the dash panel
Type terminal
Click on the Terminal application
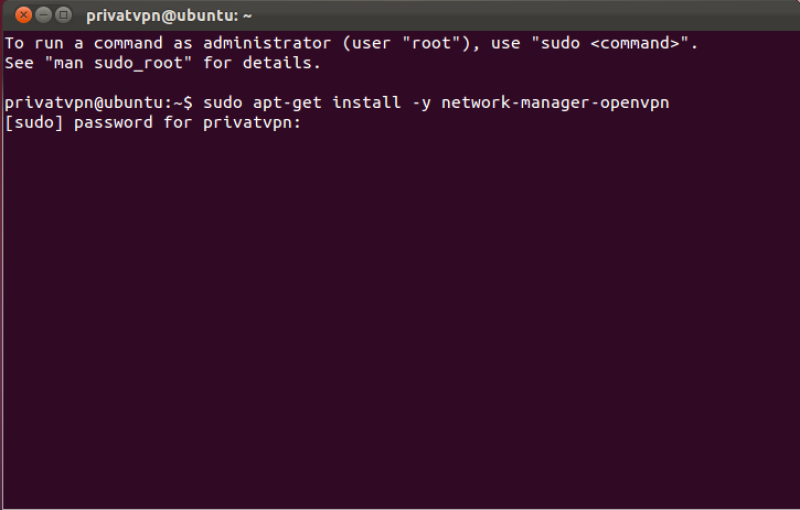
Step 3
In the Terminal, enter this line: sudo apt-get install -y network-manager-openvpn and press enter.
If you’re using Ubuntu 16.04 or later. Run this Command: sudo apt-get -y install network-manager-openvpn-gnome

Step 4
Enter your password for the Ubuntu account.
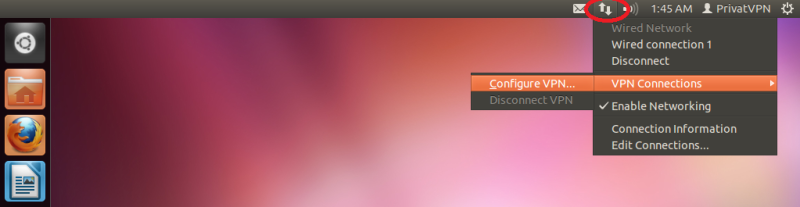
Step 5
When the installation process is completed. Click on the Network icon – VPN Connections – Configure VPN…
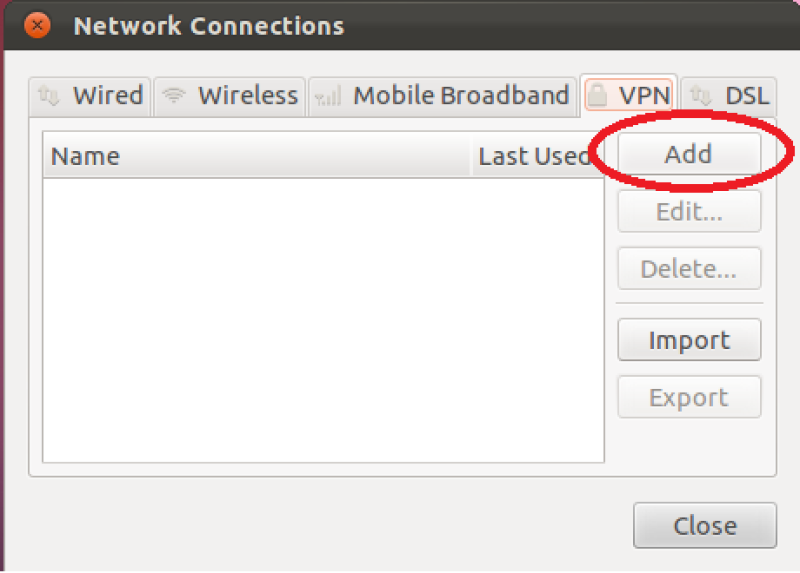
Step 6
Click on Add.
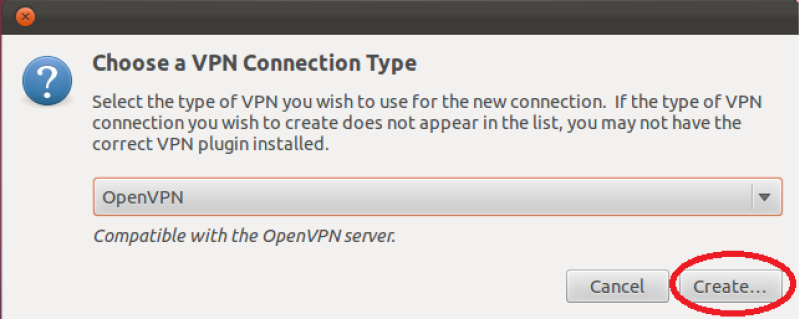
Step 7
Select OpenVPN and click on Create…
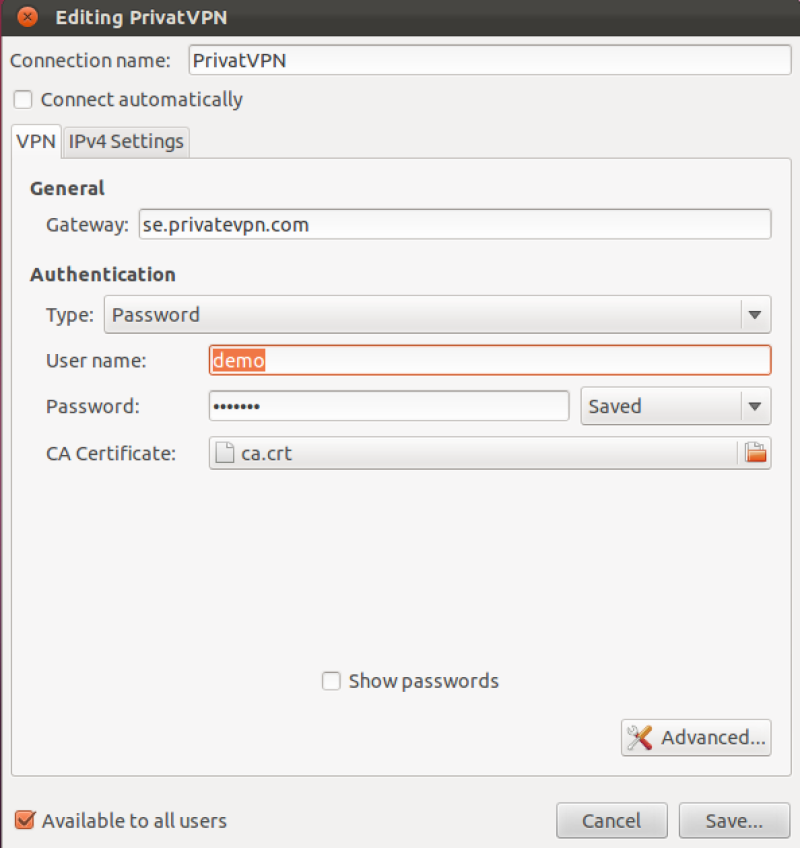
Step 8
Enter the following information. Select Connect automatically if you would the VPN to connect every time Ubuntu starts.
Connection name: PrivateVPN
Gateway: Depends on which country you want to connect to. For example Sweden, se-sto.privatevpn.com. See the server list below!
Type: Password
User name: Enter your user name for PrivateVPN
Password: Enter your password for PrivateVPN
CA Certificate: Click on the CA Certificate box
Open the ca.crt file
Click Advanced
You’ll find the server list here: Server list
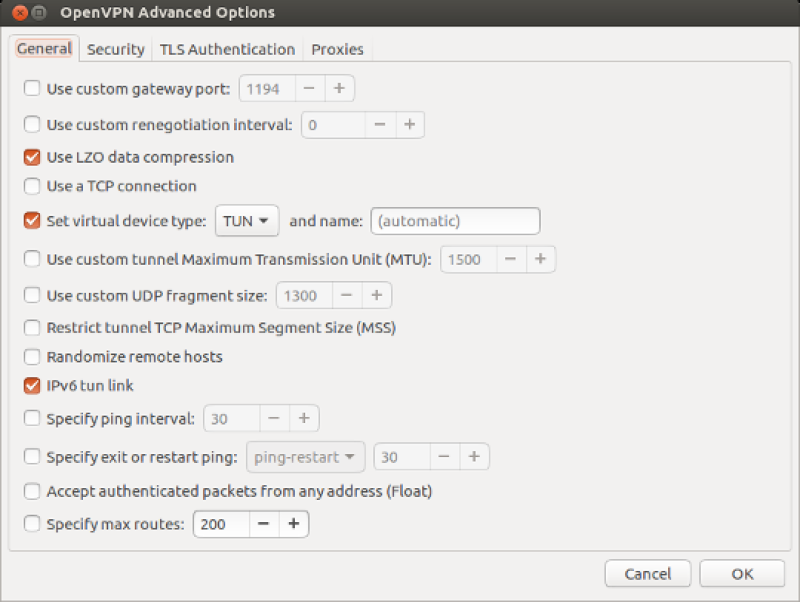
Step 9
Check Use LZO data compression
Check Set virtual device type and set it to TUN
Check IPv6 tun link
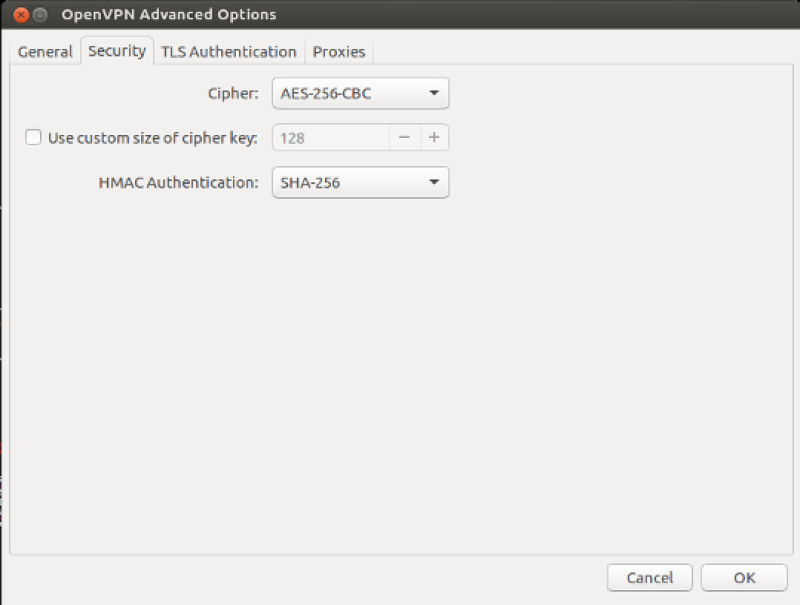
Click the Security tab
Step 10
Cipher: AES-256-CBC
HMAC Authentication: SHA-256
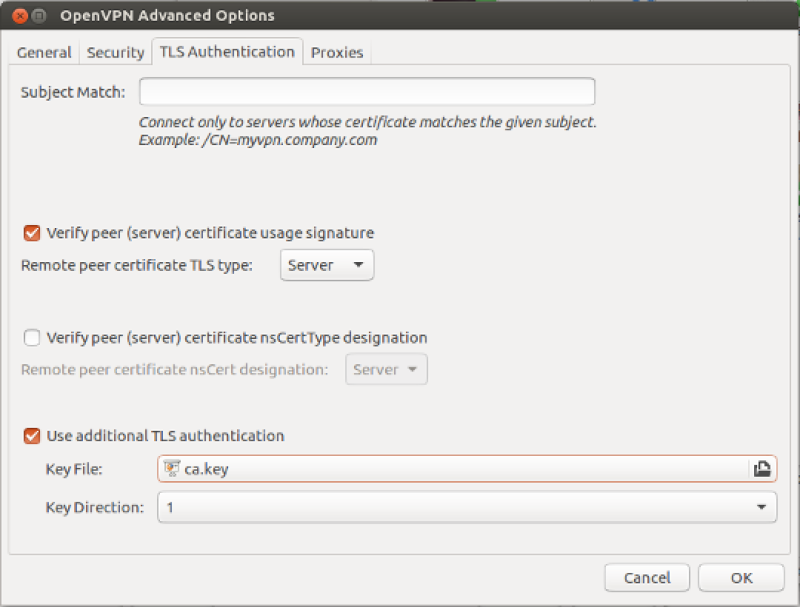
Click the TLS Authentication tab
Step 11
Check Verify peer (server) certificate usage signature and set the drop down box to Server
Check Use additional TLS authentication
Click the Key File box
Open the ta.key file
Set the Key Direction box to 1
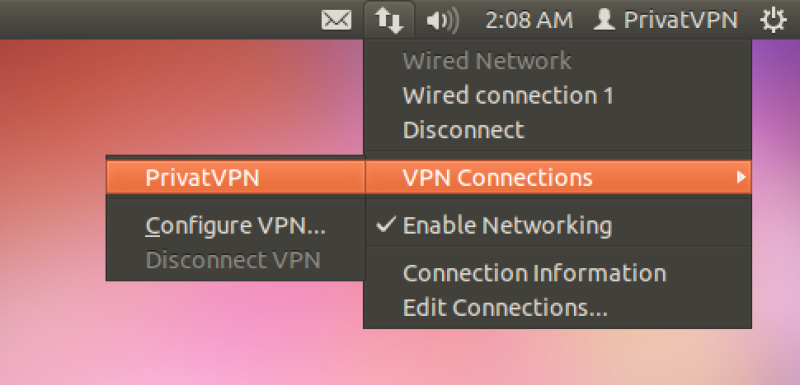
Step 12
Click on the Network icon – VPN Connections – PrivateVPN